Introduction
In this comprehensive guide, you will be taken through the steps required to set up your Arduino Uno with a Windows operating system. From acquiring the necessary components to configuring the Arduino IDE and uploading your first project, this tutorial equips you with the essential knowledge to kickstart your Arduino journey.
We will load a basic example to make the onboard LED blink. In the process you will get acquainted with design flow.
Follow us on Linkedin for everything around Semiconductors & AI
Why Should you Build your first Gadget with Arduino
There are several reasons why you might choose to build your project with Arduino:
- Beginner-friendly: The simplicity of the Arduino platform makes it an excellent choice for beginners in electronics and programming. Its software features a straightforward interface, and a vibrant community offers tutorials, project ideas, and troubleshooting assistance.https://docs.arduino.cc/learn/starting-guide/getting-started-arduino/.
- Versatility: You can utilize Arduinos for a diverse array of projects, ranging from basic blinking LEDs to intricate robotics and home automation systems. With a variety of Arduino boards on the market, each boasting unique capabilities, you can select one that suits your project requirements. https://projecthub.arduino.cc/.
- Low cost: Arduino boards and components are generally relatively affordable, making it a cost-effective way to prototype and build electronic projects.
- Open-source: Arduino is an open-source platform, which means that the hardware and software are freely available for anyone to use and modify. This allows for a lot of creativity and customization in your projects.
- Large community: There is a large and active Arduino community online and in many cities around the world. This means that you can find help and inspiration for your projects from other Arduino users.
Here are some things to consider when deciding if Arduino is right for your project:
- Complexity: While Arduino can be used for complex projects, it may not be the best choice for very complex applications that require a lot of processing power or memory.
- Performance: If your project requires high-speed processing or real-time control, you may need to consider a more powerful microcontroller platform.
- Form factor: Some Arduino boards are quite large, which may not be suitable for projects where space is limited.
Overall, Arduino is a great platform for a wide range of electronics projects, especially for beginners. If you’re looking for a user-friendly, versatile, and affordable way to get started with electronics, Arduino is a great option.
You Will Need
- Arduino Uno
- USB B Cable
- Windows 10, Windows 8, Windows 7, Mac, or Linux OS
- Arduino IDE
- About 15 minutes

Step 1: Download and Install the IDE
You can download the Arduino IDE from the official Arduino website. The Arduino board utilizes a USB to serial converter to facilitate communication with the host computer, making it compatible with a wide range of computers equipped with a USB port. The Arduino team has developed various versions of the IDE tailored for different operating systems like Windows, Mac, and Linux. For this guide focusing on Windows 10, it is essential to download the suitable IDE version according to your operating system if it varies from Windows 10.

Once downloaded, install the IDE and ensure that you enable most (if not all) of the options, INCLUDING the drivers.
Read more 7 Types of Arduino Boards to Make Your Own Gadget – techovedas
Step 2: Get the Arduino COM Port Number
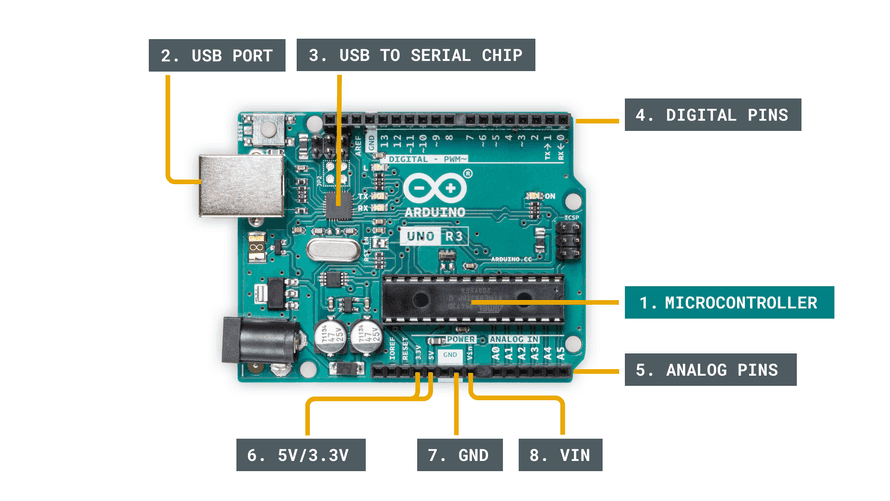
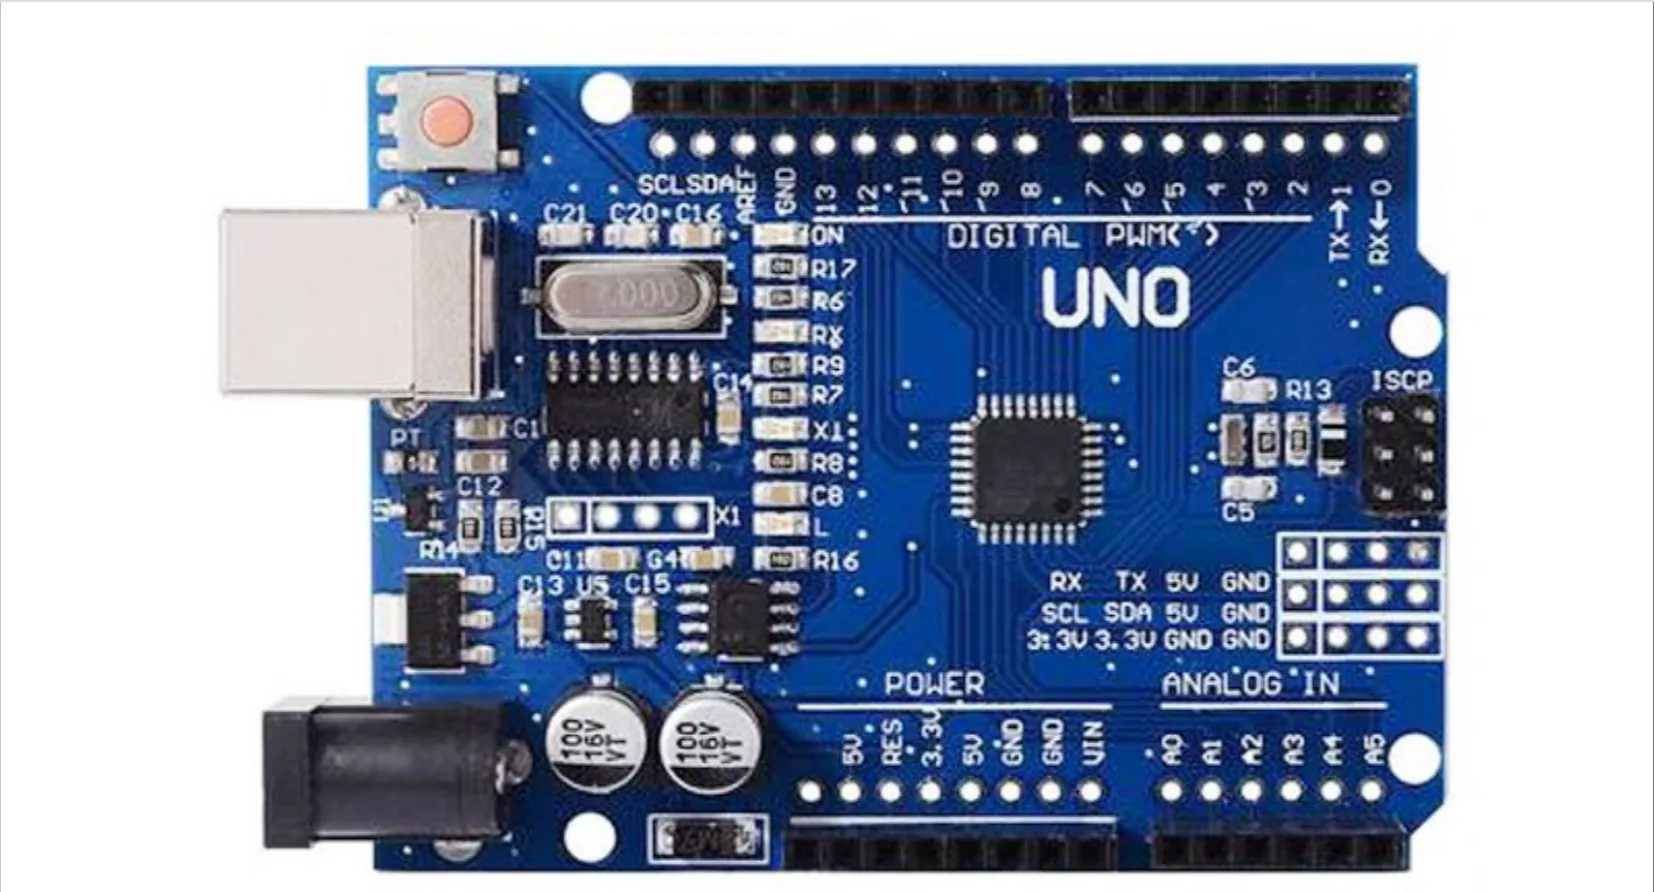
After obtaining the Arduino Uno board, the next step involves connecting it to the computer using a USB B connection. With the USB’s capability to provide 5V up to 2A, there’s no need for an additional power source for the Arduino. When the Arduino is plugged in, the computer’s operating system should detect the board as a generic COM port. For instance, my Arduino Uno utilizes a CH340G, which serves as an RS-232 serial to USB converter. Upon recognition, it’s necessary to determine the assigned port number. The most straightforward way to do this is by inputting “device manager” into Windows Search and selecting Device Manager when it appears.

In the Device Manager window, look for a device under “Ports (COM & LPT)”, and chances are the Arduino will be the only device on the list. In our Device Manager, the Arduino shows up as COM7 (We know this because CH340 is in the device name).

It’s important to note that the Arduino may not always be detected automatically. If this occurs, you can try resolving the issue by uninstalling the driver, unplugging the Arduino, plugging it back in, locating the unrecognized device, right-clicking to “Update driver,” and selecting “Search automatically.” This method typically resolves the majority of recognition issues.

Windows occasionally presents challenges with COM ports, as it has a tendency to reassign port numbers unpredictably. Windows might assign a different port number to an Arduino on subsequent connections, especially if other COM ports are frequently connected to the system, even though it’s initially recognized on port 7.
So, if you can’t find your Arduino on the port that you usually use, just go to your Device Manager and check what port it’s actually on.
Read more Kickstart Your VLSI Career: Crafting a Winning Resume for Freshers – techovedas
Step 3: Configure the IDE
Having identified the COM port where the Arduino is located, the next step involves launching the Arduino IDE and setting it up to utilize the same device and port. To begin, open the IDE and then go to Tools > Board > Arduino Uno. However, if a different board is being used, it’s essential to choose the appropriate board from the menu.

Next, you must tell the IDE which COM port the Arduino is on. To do this, navigate to Tools > Port > COM7. Obviously, if your Arduino is on a different port, select that port instead.

Read more 9 Open-Source VLSI Projects for Fresher Jobs – techovedas
Step 4: Loading a Basic Example
To simplify the process, we will load an example project included in the Arduino IDE will be loaded. This particular example enables the onboard LED to blink continuously for a second. To access this example, click on File > Examples > 01.Basics > Blink.

// the setup function runs once when you press reset or power the board
void setup() {
  // initialize digital pin LED_BUILTIN as an output.
  pinMode(LED_BUILTIN, OUTPUT);
}

// the loop function runs over and over again forever
void loop() {
  digitalWrite(LED_BUILTIN, HIGH);   // turn the LED on (HIGH is the voltage level)
  delay(1000);                       // wait for a second
  digitalWrite(LED_BUILTIN, LOW);    // turn the LED off by making the voltage LOW
  delay(1000);                       // wait for a second
}
Code for blink led. You can change the number in delay(); function as per your requirement
After loading the example, it’s time to check and upload the code. The verification stage examines the code for errors and compiles it into a format ready for uploading to the Arduino. Then, the upload stage transmits the binary data to the Arduino through the serial port.
To check and compile the code, simply click the check mark button located in the upper left window.

If the compilation stage was successful, you should see the following message in the output window at the bottom of the IDE. You might also see a similar message—just it’s one that does not have words like “ERROR” and “WARNING”.

With the code compiled, you must now upload it the Arduino Uno. To do this, click the arrow next to the check mark.

After uploading the code, the Arduino will be programmed and it should start running the code. It takes about 2 seconds to respond.
Conclusion
Congrats! Now you have successfully created your first project on Arduino. It blinks the LED on the board at intervals defined by your code.cWhile we only got a light to blink in this project, you can expect much more in the future. Try your hand at interfacing with displays, taking measurements and talking over the internet.


